Unofficial Seattle Public Library Stamp Rally
Visit every branch of the Seattle Public Library system to join the asynchronous, any-time-you-want stamp rally! Follow the printing instructions below to print it at your local branch.
Printing your booklet

Download
Download the PDF file and copy it to a USB drive, or view it on a library computer.

On a library computer, open the PDF in Acrobat or other PDF program and select “Print”. Make sure it’s printing on both sides and along the short side. Print in black & white.

Stamp
Fold the papers in half and optionally staple together. Then you’re ready to collect stamps!
How do I get my booklet stamped?
Bring your booklet to the Circulation desk, or where library staff are using computers. Then ask something like…
- “Could you please stamp this for me with the stamp this branch uses on new books?”
- “Do you still use stamps with today’s date on it? Could you use that stamp on this booklet for me please?”
NOTE: since this is an unofficial fan-made stamp rally, library staff aren’t aware or prepared for it. If they decline to stamp your booklet, you can always write the date on the location yourself.
How I made this!
In my quest to visit every branch of the Seattle Public Library, I wanted a cool way to mark my progress, so the booklet was born. The original specifications I put on myself were:
It must have a spot for every library in Seattle.
It has to be printable at the library (since I don’t own a printer).
It will be given away for free as digital copies (so no copyrighted material allowed).
I spent a whole evening laying out the book in Affinity Publisher 2, leaving space for a front page. I copied the names, addresses, and phone numbers from the Seattle Public Library website because Seattle Independent Bookstore Day taught me that you’ll never know when you need to call! (Mostly to see how late they’re open, and maybe can I get a stamp a few minutes after closing?)
I also made sure everything fit in 10 black and white pages or less—the current allocation everyone gets of free printing at Seattle Public Library ($1.50 per week).
Then I started working on the illustrations myself to keep everything royalty free. I found photos on the SPL site, Google maps, or in the public domain.
I ran into several issues during the first printing:
1. I can’t print from my personal computer to a library computer with “double sided” settings on.
2. Whenever I tried to “print to PDF” in the Affinity design suite, it kept saving as an “XPS” file (even when I was definitely using the ‘Print to PDF’ feature which has always worked).
3. I can’t print an XPS file easily.
4. “Print to PDF” is different than “Export to PDF”.
I learned that the “print” function does some fancy math with the spreads, determining which pages should actually get printed on what piece of paper to make sure the booklet folds correctly.
But I learned that the hard way. Although it printed out under $1.50, the page numbers were way out of order.
The first copy of the booklet with hand written edits:
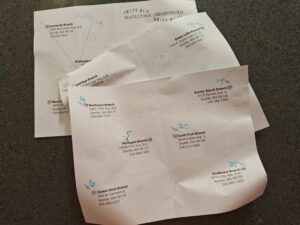
Print a real copy early in the design process to get a feel for how the final version will look.
Try it out to see if there are any improvements that can be made. For example, I intended for the libraries to stamp on top of the illustrations, but in practice people don’t want to stamp on the art. Luckily, there’s space around the art for them to stamp.
Some libraries have multiple stamps, and one library even had 7 stamps! They stamped them all since there was enough space.
“Print” and “Export” do significantly different things.
“XPS” files are booklets / ebooks!
Lines that are 1 pixel in width are difficult to print on a standard printer.
Some fonts are designed to be digital-first, and not necessarily printed.